For additional assistance, please contact support@metavilabs.com.
Tube Formation Assay
The Tube Formation Assay measures the formation of closed loop structures in time-lapse movies.
Contents
Overview Analysis Outputs Modifying AnalysisOverveiw
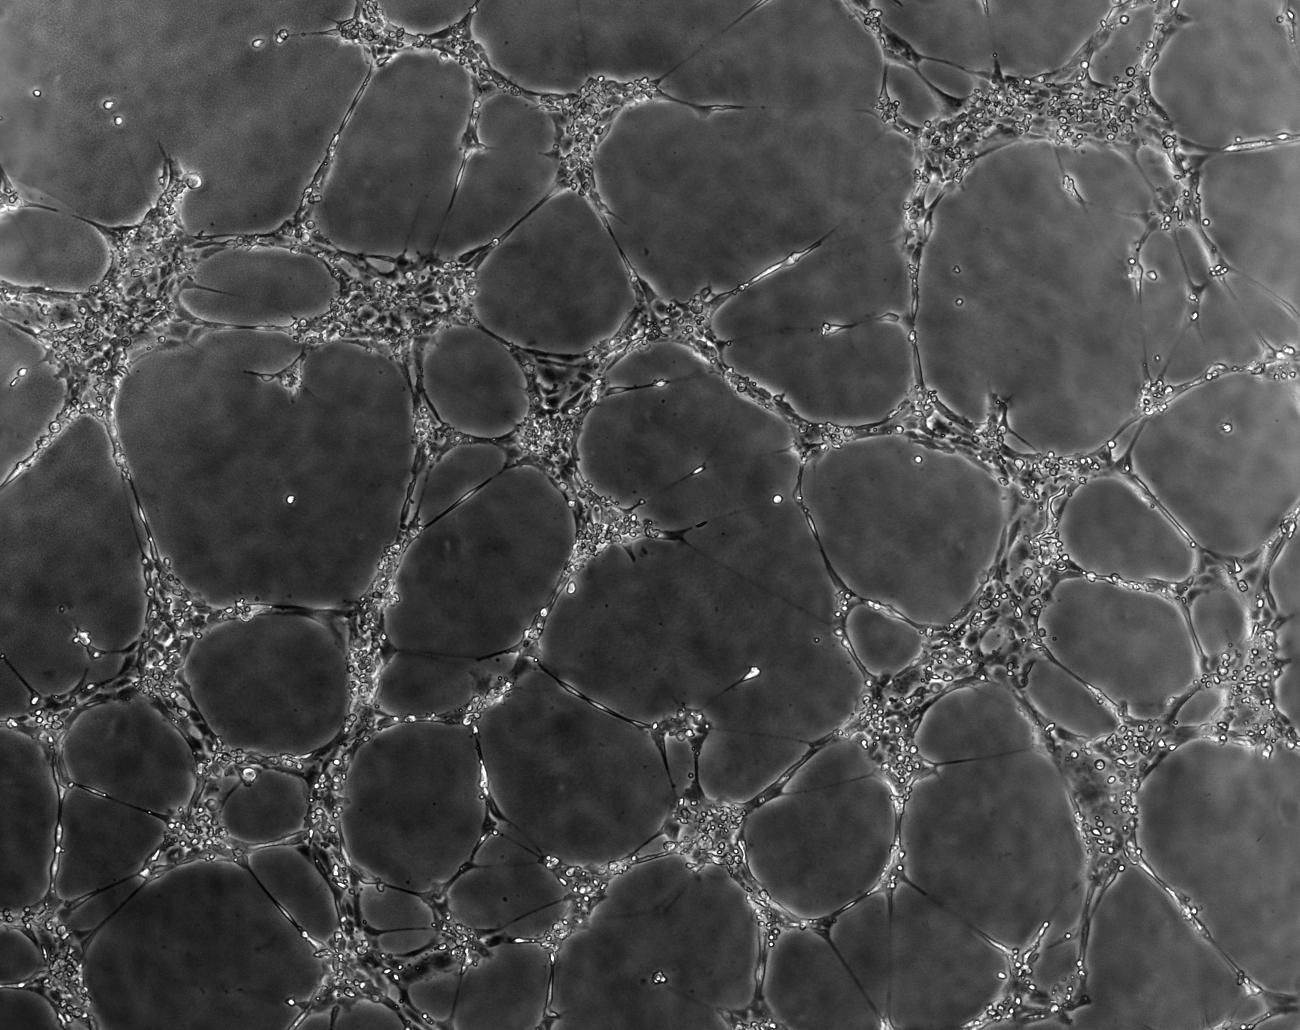
The microscope should be setup to use Phase Contrast as it will provide an image with maximum constrast of the covered area (see example below).
When creating a Tube Formation analysis, be sure to correctly enter the image resolution in pixels per µm. The algorithms are looking for cells and structures in a range of sizes and this number allows the program to determine cells sizes as they appear in pixels. An incorrect value for the image resolution may result in failure to identify the structures. Also, this value is used to determine the surface area in µm². Typical values for the image resolution are 0.5 (low resolution) to 2.0 (high resolution). Please see the help center page on determining the pixel resolution for more information.
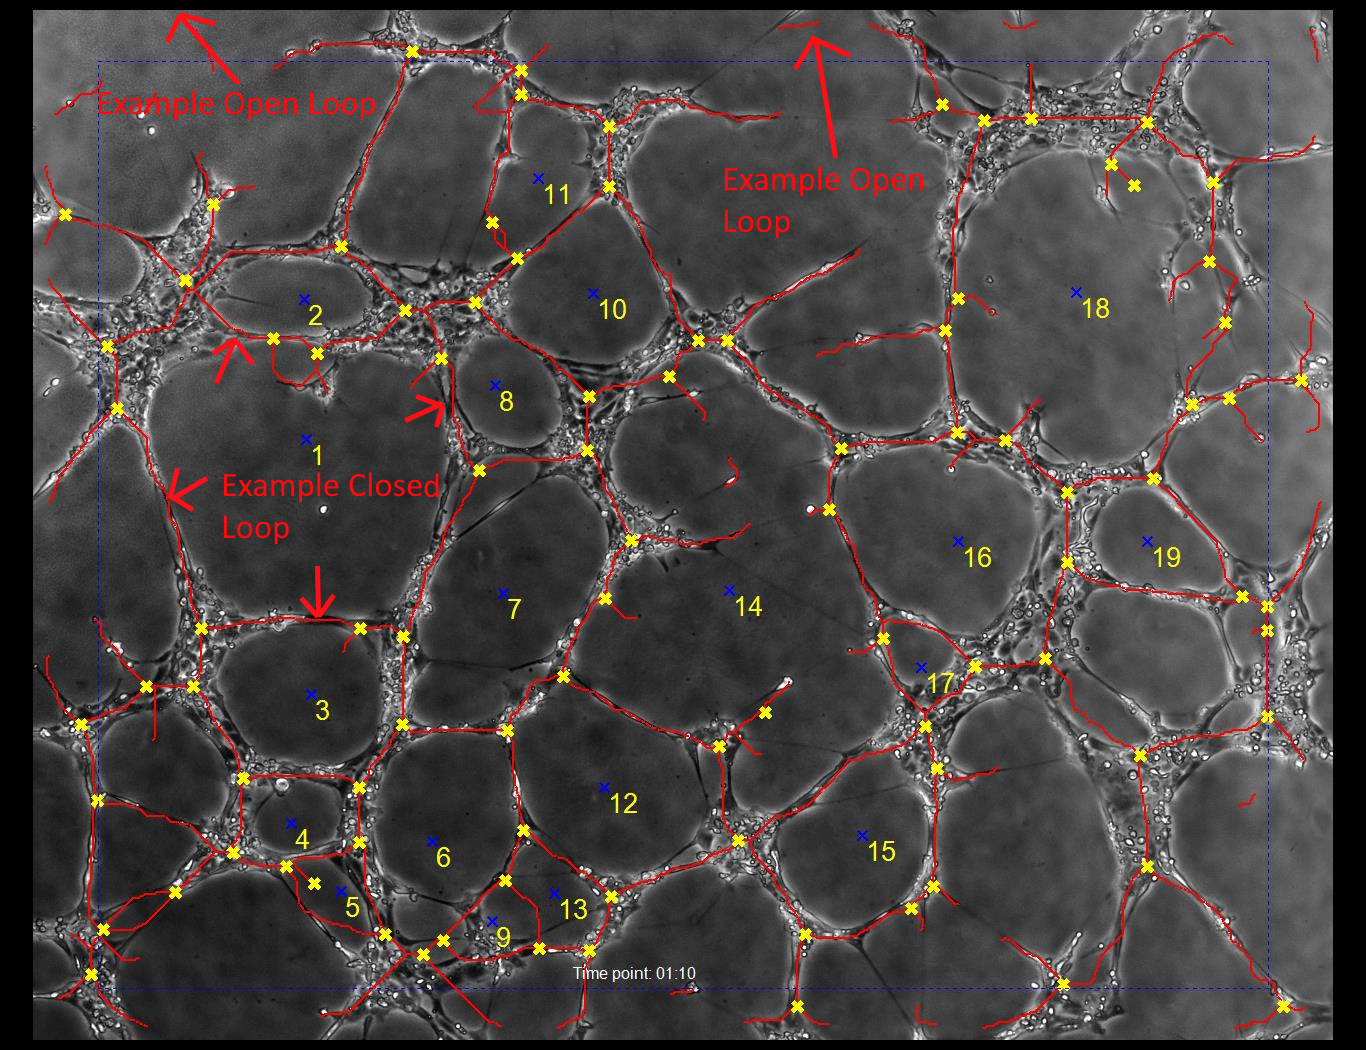
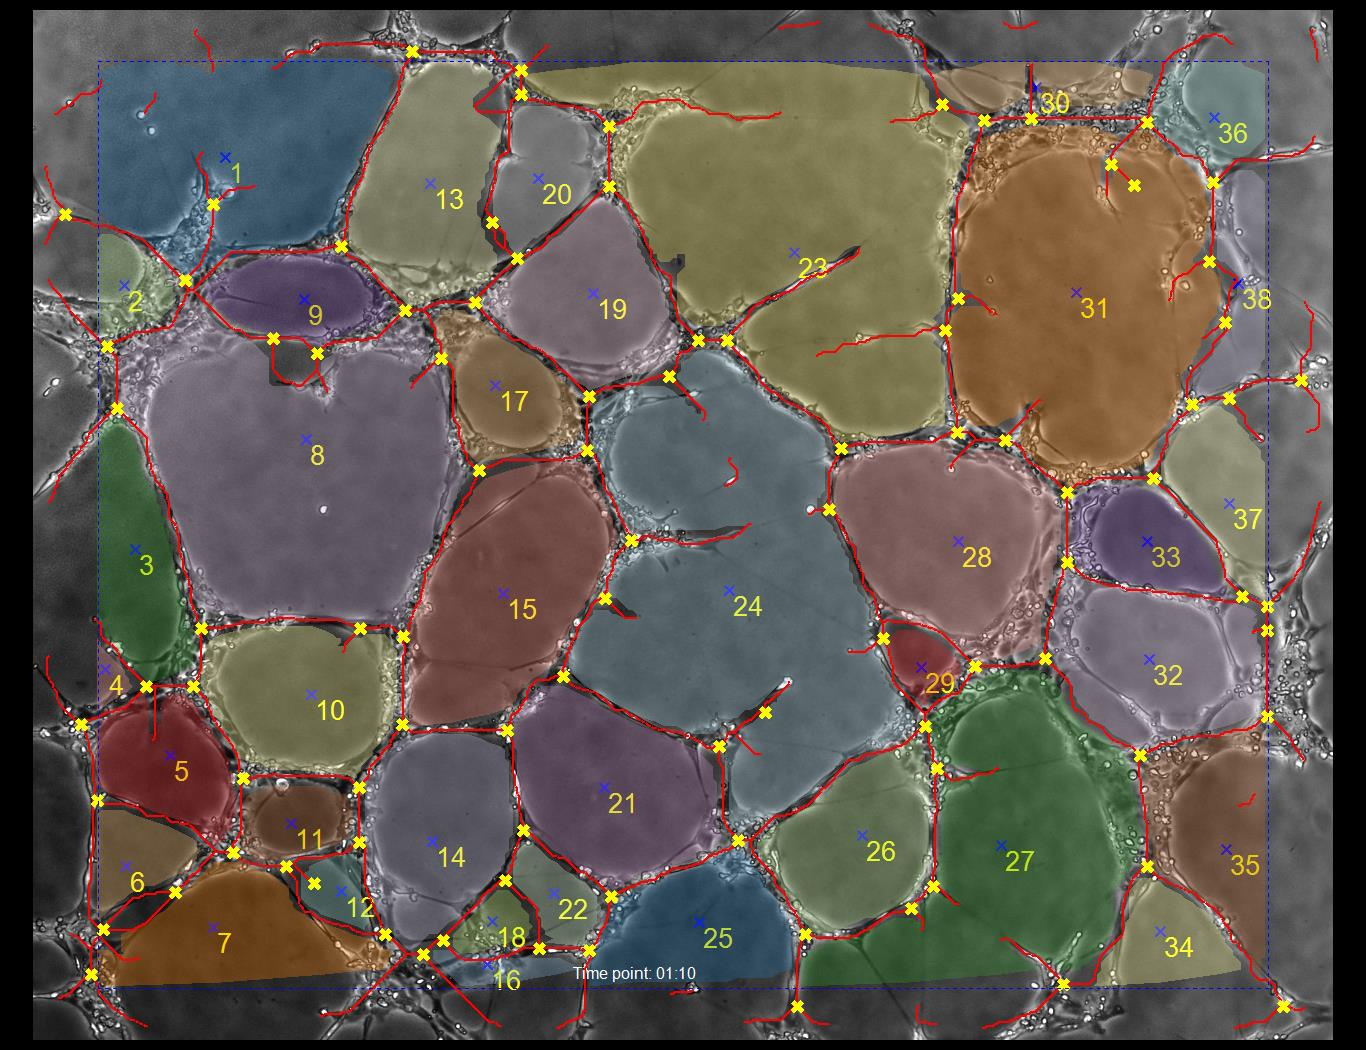
With a highly contrasted image, the analysis algorithms will be able to identify the vessel walls which form closed and open loops. In the sample output image below, closed loops are assigned numbers. Loops which are on the edge of the frame are not regarded as closed.
The blue dotted line indicates the margin. Loops which cross the margin are not considered closed. A loop is closed if there is no path out of the image without crossing a tube (marked in red).
The branch points are labled with yellow X marks.
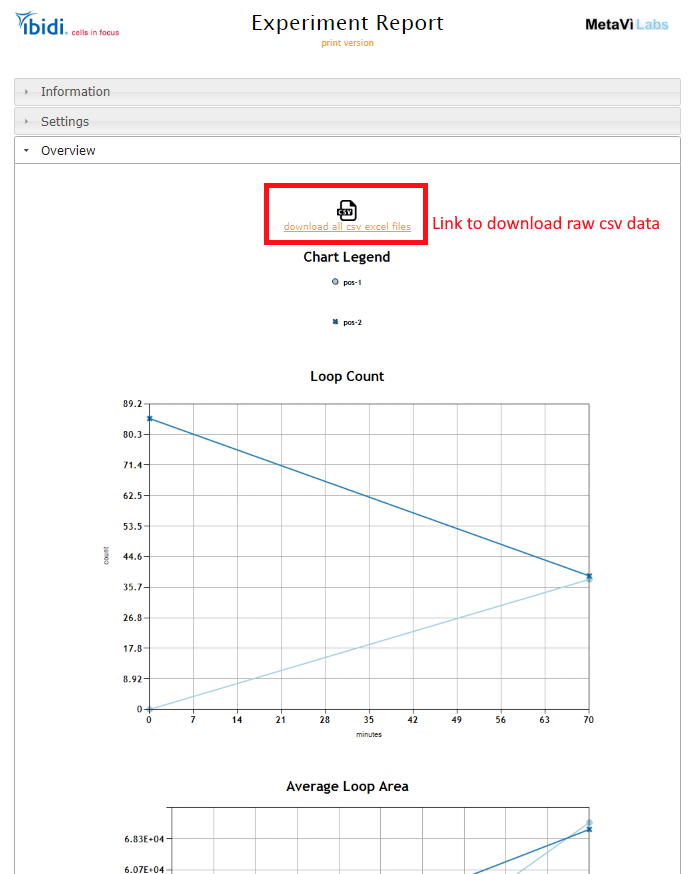
Analysis Outputs
The outputs of the analysis are:- Loop Count - the number of closed loops detected in each frame.
- Average Loop Area - The surface area of each closed loop divided by the number of closed loops.
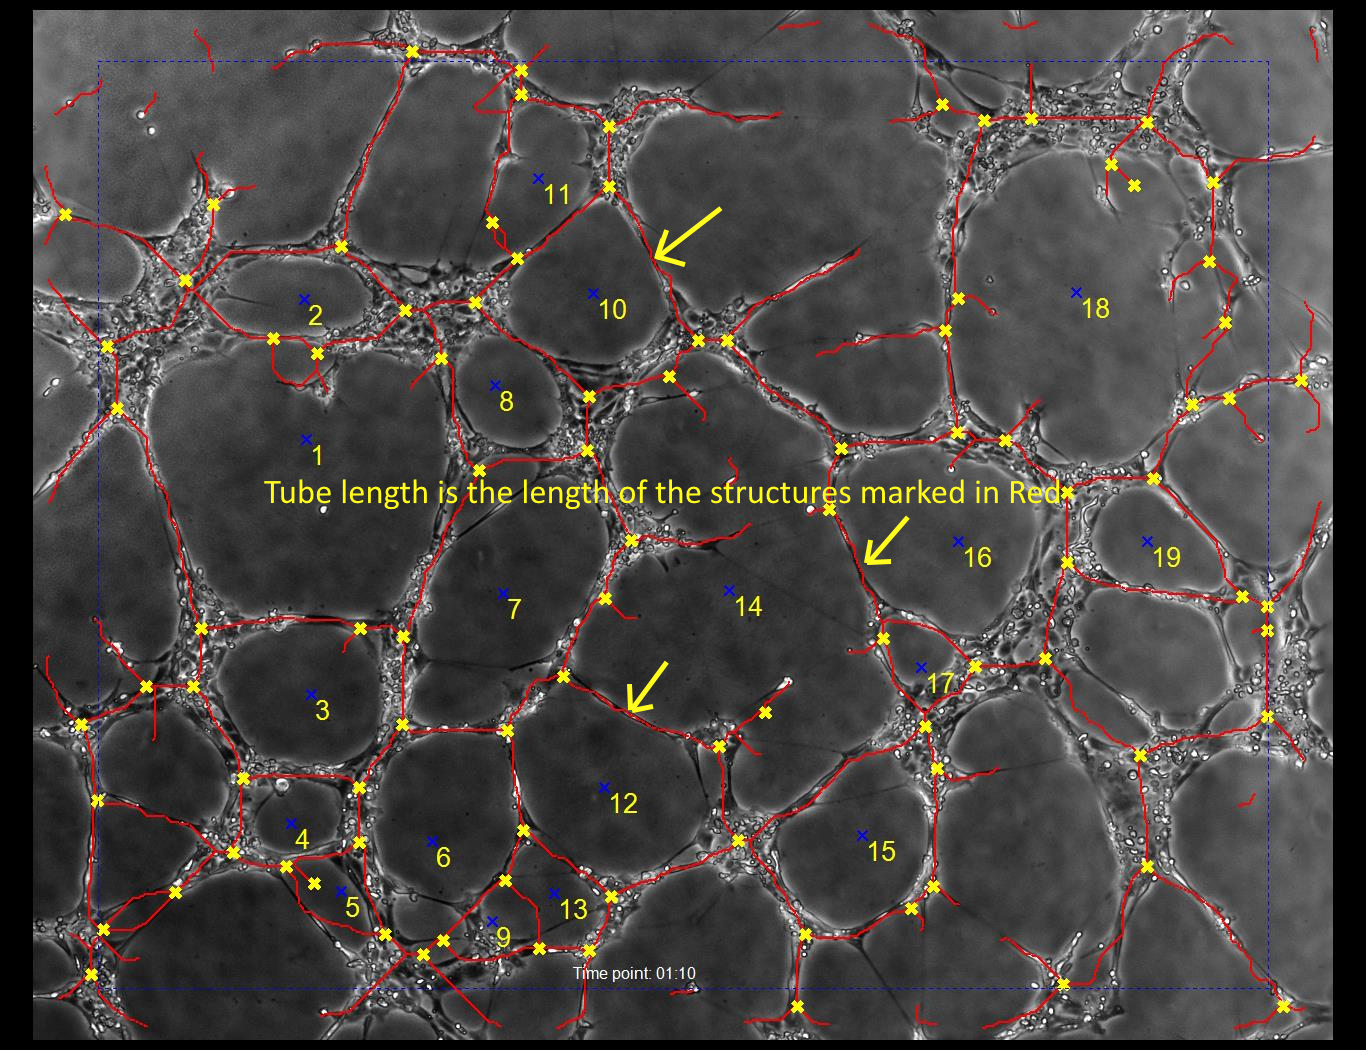
- Total Tube Length - The total of all the tube length (all lines marked in red).
- Average Tube Length Per Loop - The total of all the tube length (all lines marked in red) divided by the number of closed loops.
- Branch Count - The number of branches detected at each point in time.
All the resutls are avaible in the reports as graphs. Additionally, in each report is a link to download the raw data in csv files which can be imported into excel and other analysis tools.
Modifying Analysis
The analysis can be modified by adding specific text commands in the Experiment Description. For example, the loops can be colorized as shown below. Also, you will notice that loops that are adjacenet to the margin are now considered closed; this is also a modifier that can be added to the description to change the analysis.
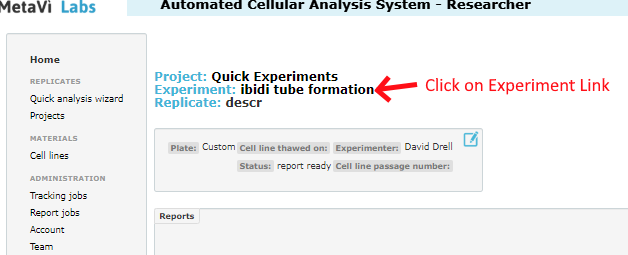
To modify the analysis you must open the parent Experiment page and edit the description. In addition to your own description text, you will add one or more special modifiers (see below). To edit the experiment you must navigate to the Experiment page. Either start by opening the project, then open the experiment in the project. Or if you are already in the replicate page, you can follow the link at the top of the page, as shown below:
Once inside the experiment page, you will see the edit icon at the top. Click this:

Inside the experiment edit page, you can add text to the description field. You can place any text you like. In addition to your own description, you can optionally add any of the following statements (at any pace in the description, either before or after your own descriptive text).
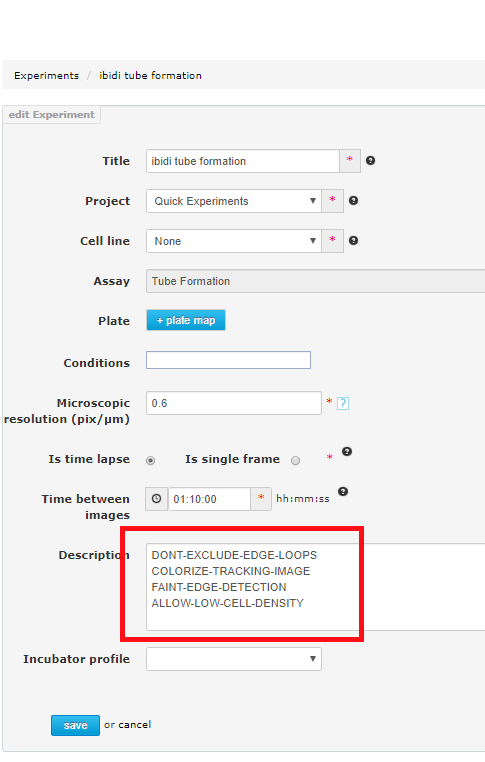
The experiment modifiers must be typed carefully so that they appear exactly as below.
- DONT-EXCLUDE-EDGE-LOOPS - Allows loops to be closed by the margin line (blue dotton line at the edge of the image).
- COLORIZE-TRACKING-IMAGE - Add color to the closed loops.
- FAINT-EDGE-DETECTION - Place more emphasis on very faint tubes to close more loops.
- ALLOW-LOW-CELL-DENSITY - If your time point 0 image (before loops have formed) has low cell density, this setting will allow analysis to continue.
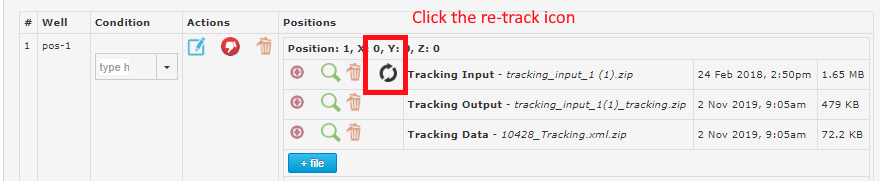
If you have already uploaded images, for the modifiers to have an effect, you must re-track the images. Either create a new replicate and re-upload, or just re-track the existing source images: